Secure your Spring Boot Rest API with Keycloak
Security is often overlooked and is seen as a burden that goes against development velocity. But in today’s age, the more secure layers there are, the safer it is. That is what Security in Depth is, and one part is to secure our REST API.
In this blog post, we are going to learn how to add authentication to a Spring Boot REST API.
And instead of building a brittle custom implementation that might contain security issues, it is better to rely on battle-tested solutions. One of them is Keycloak, an open-source identity, and management solution developed by Red Hat.
In a previous post, we have already learned how to set up Keycloak using Docker, and we are going to use this setup as a starting point.
Of course, you can set up your Keycloak instance however you want. The only requirement is to have a running Keycloak instance.
Project setup
The first step is to generate the spring boot project using Spring Initializr. In this tutorial, We are using the spring CLI via SDKman, but it can quickly be done using the web UI https://start.spring.io/ or directly through your IDEA https://www.jetbrains.com/help/idea/spring-boot.html.
To have a walkthrough of how to set up the CLI on your own machine, follow this guide https://docs.spring.io/spring-boot/docs/current/reference/html/getting-started.html#getting-started.installing.cli.sdkman. Once you have installed the CLI , execute this command to generate the project with the necessary dependencies.
spring init --dependencies=web,data-jpa,h2,lombok,security spring-boot-keycloak
We package the following dependencies :
- the web dependency for the REST API
- the spring data JPA for the data access layer, which uses hibernate as the default Object Relational Mapping tool
- the h2 library to provide an easy-to-use in-memory embedded database. This type of database is suited for small toy projects such as this one, but it should not be used for any serious project that will be shipped to production at some point
- Lombok to generate snippets of code through annotation and avoid any boilerplate code
- The security dependency to get access to Spring Security
On top of that, we also add the Keycloak Spring Boot Adapter dependency to our pom.xml.
...

<properties>
	<keycloak.version>17.0.0</keycloak.version>
</properties>

...

<dependencies>
	...
	<dependency>
		<groupId>org.keycloak</groupId>
		<artifactId>keycloak-spring-boot-starter</artifactId>
		<version>${keycloak.version}</version>
	</dependency>
</dependencies>
This adapter provides an implementation to integrate Keycloak with Spring Security.
The configuration for the adapter is placed in the application.yml file.
server:
  port: 9000

spring:
  datasource:
    url: jdbc:h2:mem:mydb
    username: mozen
    password: password

keycloak:
  realm: master
  auth-server-url: http://${KEYCLOAK_HOST:localhost}:${KEYCLOAK_PORT:8180}/auth
  resource: spring-app
  bearer-only: true
This resource is set up as bearer only. This means that this application is not participating in the login flow, and it expects all received requests to contain the authentication bearer token.
With this type of client, we rely on other clients to execute the authentication flow and get the bearer token. Usually, a frontend application handles the login and gets the bearer token, then sends requests to the backend application by providing the token in the HTTP headers.
We use the master realm, which is the default Keycloak realm.
There are many more properties you can configure here to fit your needs. To get an overview of all of them, you can checkout out this page.
Building the application without security
Let’s define the necessary components for our simple HTTP endpoint.
First, let’s create a simple Plant Entity that will represent the resource of our REST API.
 package com.mozen.springbootkeycloack.model;

import lombok.EqualsAndHashCode;
import lombok.Getter;
import lombok.Setter;
import lombok.ToString;
import org.hibernate.annotations.NaturalId;

import javax.persistence.*;
import java.time.Instant;

@Entity
@Table(name = "plant")
@Getter
@Setter
@ToString
@EqualsAndHashCode
public class Plant {

    public Plant() {
        this.createdAt = Instant.now();
    }

    public Plant(String name, String scientificName, String family) {
        this.name = name;
        this.scientificName = scientificName;
        this.family = family;
        this.createdAt = Instant.now();
    }

    @Id
    @GeneratedValue(strategy = GenerationType.IDENTITY)
    @Column(name = "id")
    private Long id;

    @NaturalId()
    @Column(name = "name")
    private String name;

    @NaturalId()
    @Column(name = "scientificName")
    private String scientificName;

    @Column(name = "family")
    private String family;

    @Column(name = "createdAt")
    private Instant createdAt = Instant.now();
}
We then create a Spring JPA Repository for this entity.
package com.mozen.springbootkeycloack.repository;

import com.mozen.springbootkeycloack.model.Plant;
import org.springframework.data.repository.CrudRepository;

public interface PlantRepository extends CrudRepository<Plant, Long> {
}
By extending the CrudRepository interface, we get access to all CRUD operations on the entity.
Let’s continue with the business layer.
package com.mozen.springbootkeycloack.service;

import com.mozen.springbootkeycloack.model.Plant;
import com.mozen.springbootkeycloack.repository.PlantRepository;
import org.springframework.stereotype.Service;
import org.springframework.transaction.annotation.Transactional;

import java.util.Optional;

@Transactional
@Service
public class PlantService {

    private PlantRepository plantRepository;

    public PlantService(
            PlantRepository plantRepository) {
        this.plantRepository = plantRepository;
    }

    public Plant getPlant(long plantId) throws RuntimeException {
        Optional<Plant> plantOpt = plantRepository.findById(plantId);

        if (!plantOpt.isPresent()) {
            throw new RuntimeException("Plant could not be found with id : " + plantId);
        }

        return plantOpt.get();
    }
}
This sample application is so small that we could skip implementing this service and implement the logic directly inside the controller, but let’s do things right regardless.
Finally, We create our HTTP endpoint inside a Spring Controller.
 package com.mozen.springbootkeycloack.controller;

import com.mozen.springbootkeycloack.model.Plant;
import com.mozen.springbootkeycloack.service.PlantService;
import com.sun.istack.NotNull;
import lombok.extern.slf4j.Slf4j;
import org.springframework.web.bind.annotation.*;

@Slf4j
@RestController()
@RequestMapping("/plant")
public class PlantController {

    private PlantService plantService;

    public PlantController(PlantService plantService) {
        this.plantService = plantService;
    }

    @GetMapping("/{plantId}")
    public Plant getPlant(@PathVariable @NotNull Long plantId) {

        log.info("Request for plant " + plantId + " received");

        return plantService.getPlant(plantId);
    }
}
If you want more details on this implementation, I have made a similar application in a previous blog where I go into more details on the how and why of this implementation.
Keycloak configuration
We can now dive into Keycloak configuration.
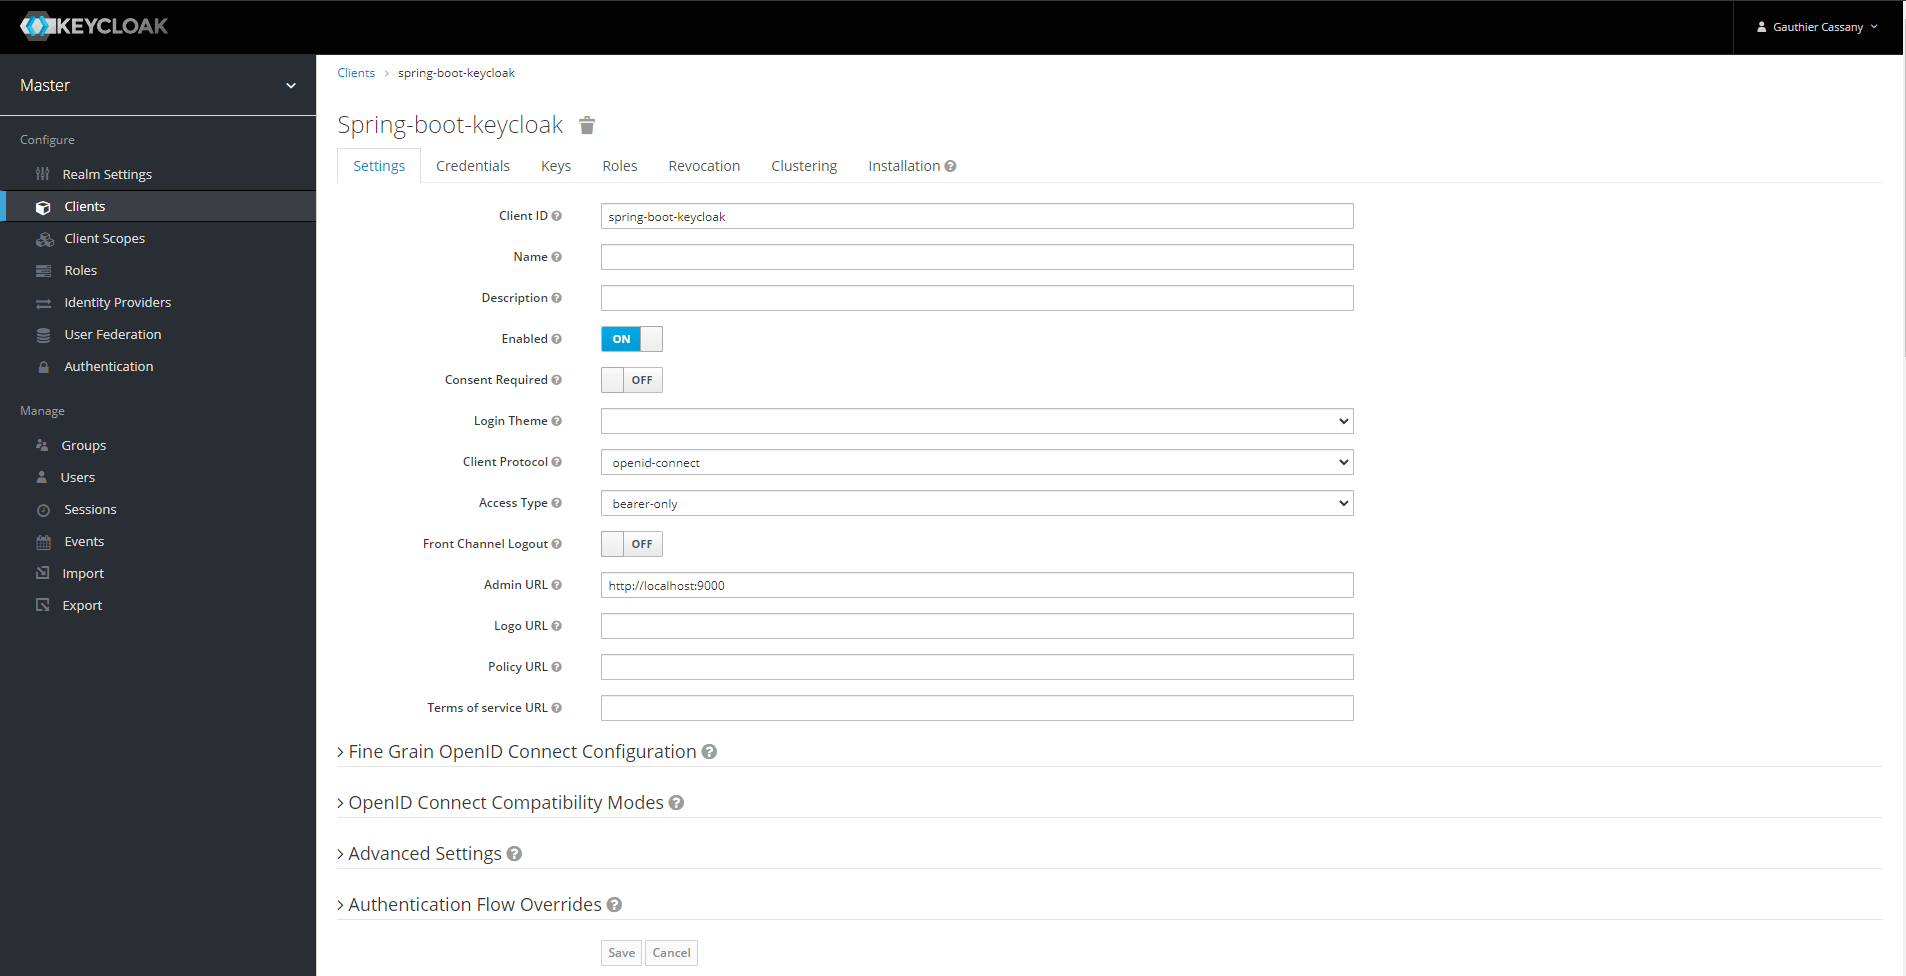
Once logged into the admin console, we can go to the client page and create the client for our Spring Boot application.
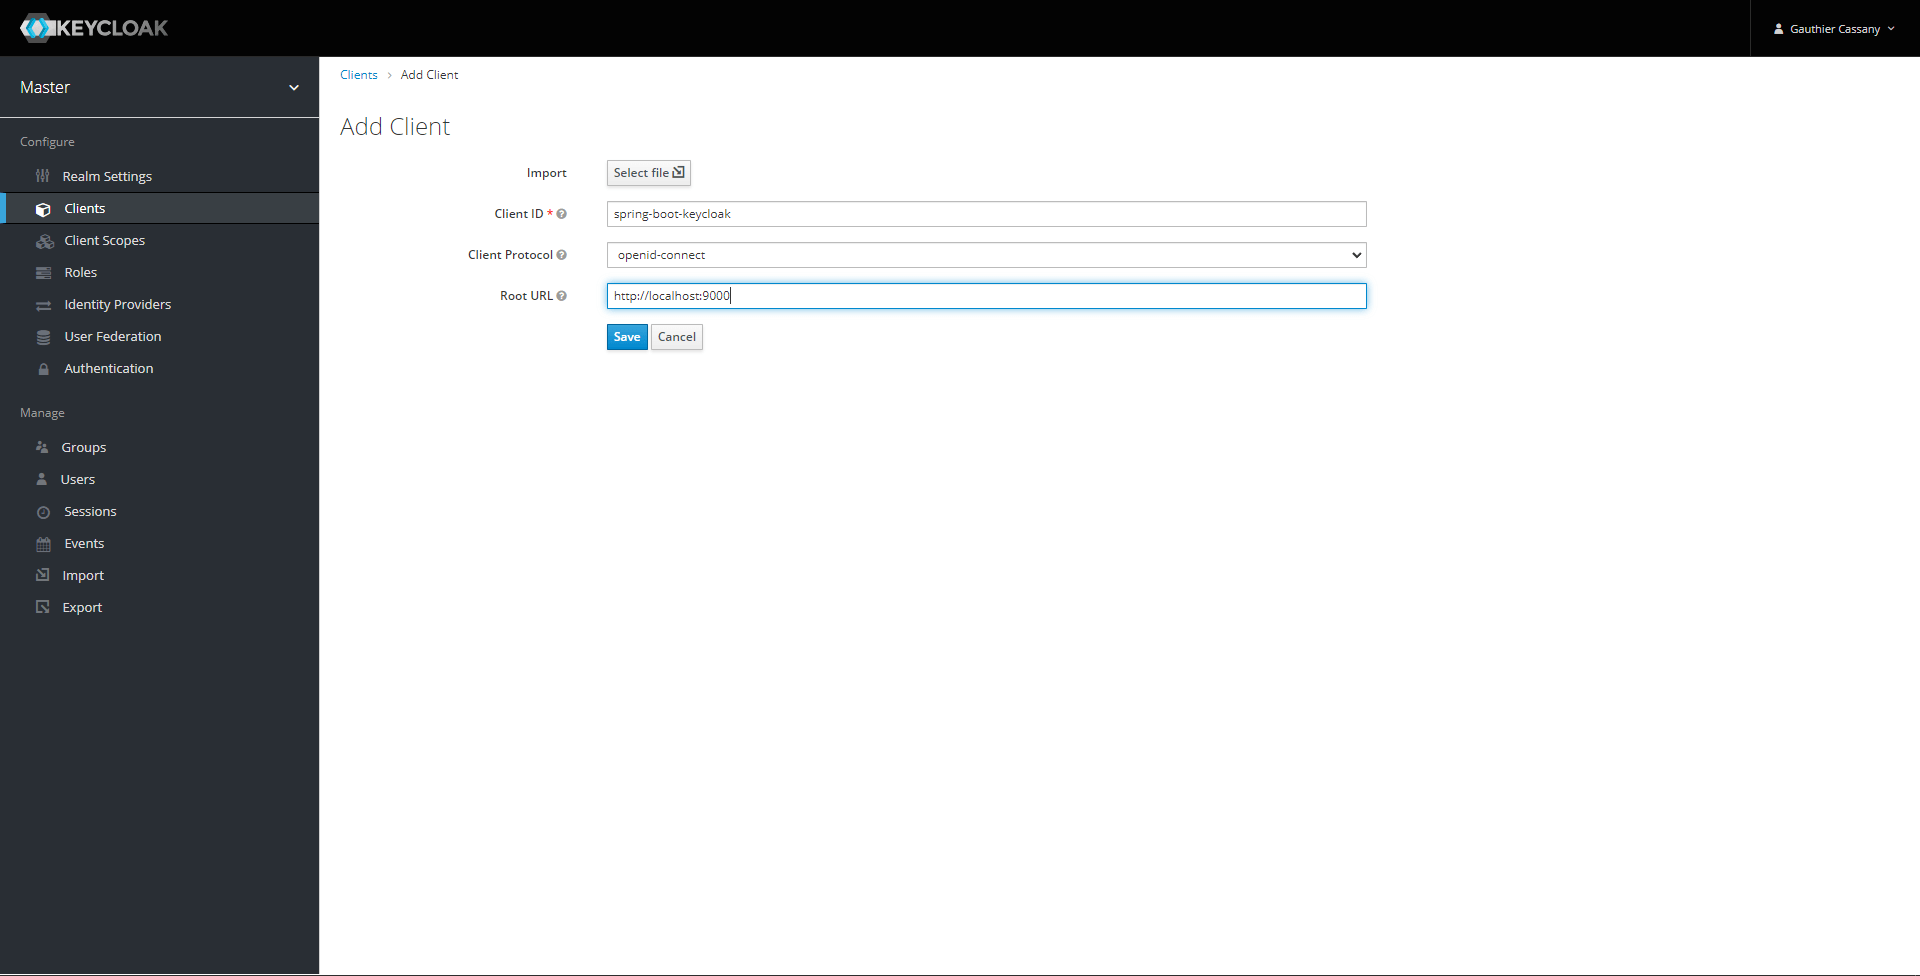
We have to set the Access Type to bearer-only to match the configuration of the application.yml file.
In order to test our endpoint, we define a second client that will represent the client (in the sens of client-server relationship) for our Spring application.

This client is of type public, and is responsible for the login with Keycloak to get the access token that will be sent in each request to the Spring Boot application.
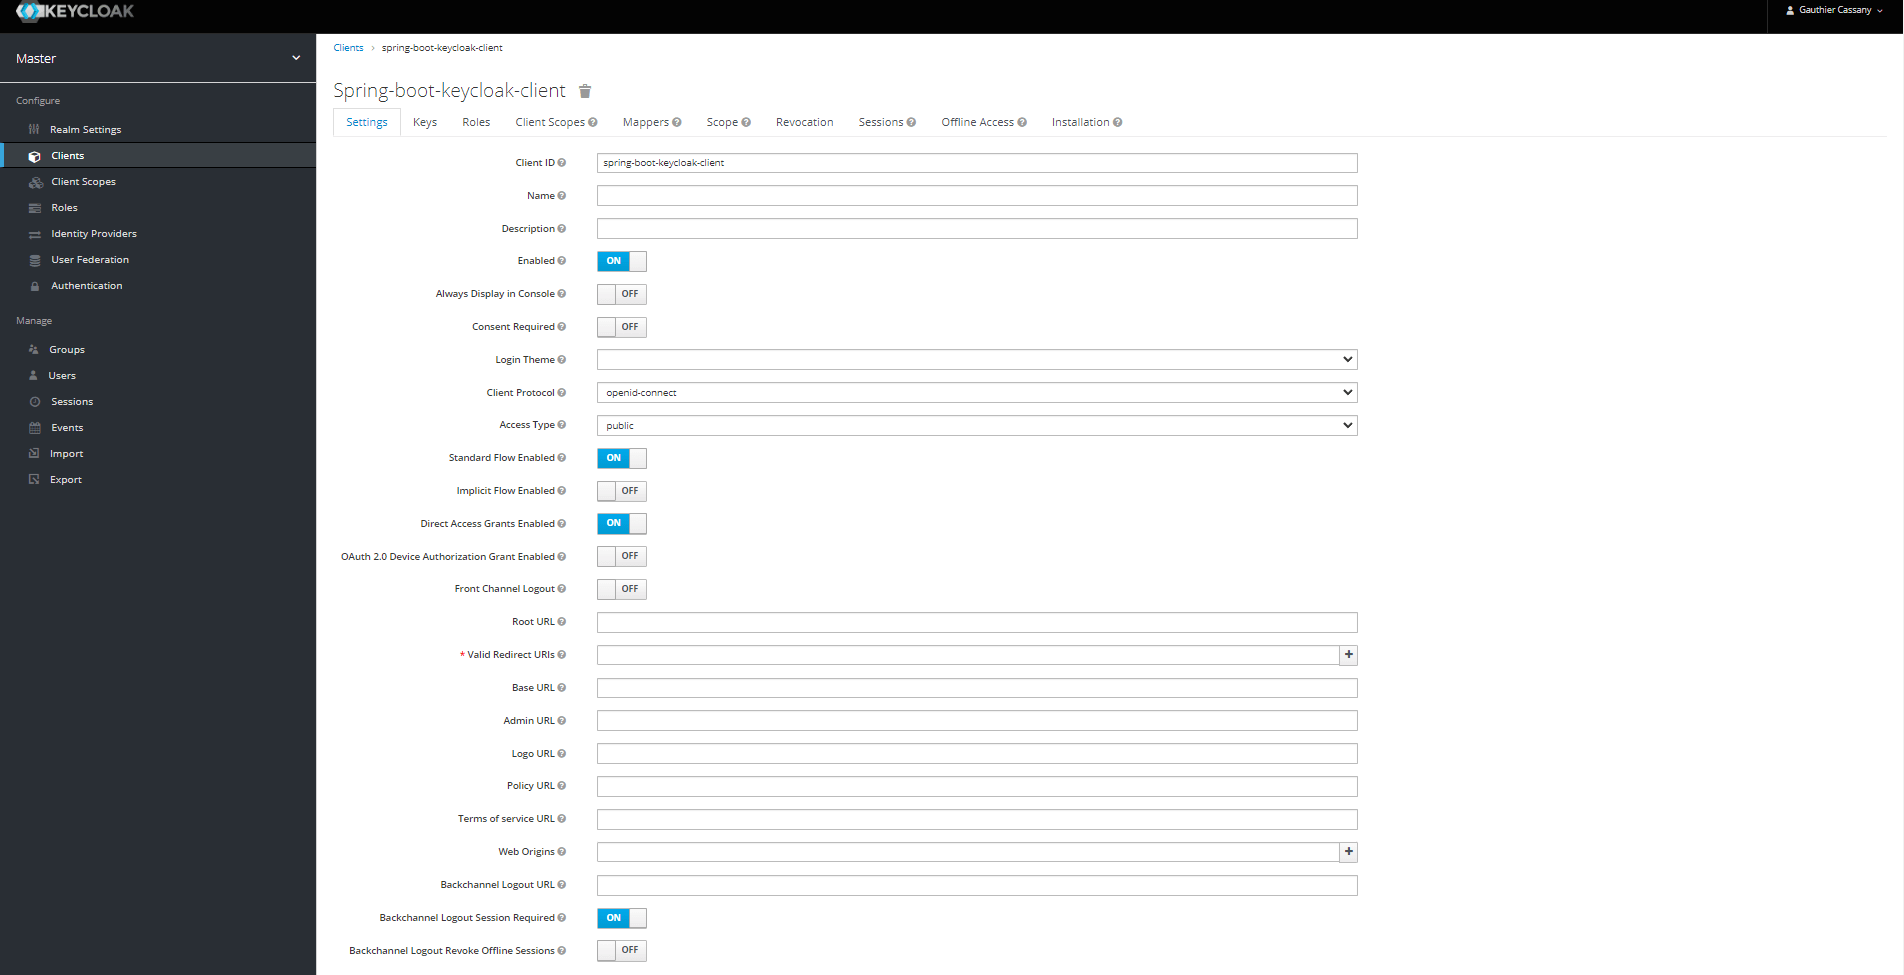
This type of client is usually used for frontend applications that handle the login process inside the browser.
Spring security Setup
Keycloak is now ready, and so is our application, but it has yet to be secured.
For that, we need to set up Spring Security.
It can be configured like any other Spring Boot project, by creating a class extending the WebSecurityConfigurerAdapter.
We make use of the previously added Keycloak adapter by extending the KeycloakWebSecurityConfigurerAdapter.
package com.mozen.springbootkeycloack.security;

import org.keycloak.adapters.springsecurity.KeycloakConfiguration;
import org.keycloak.adapters.springsecurity.authentication.KeycloakAuthenticationProvider;
import org.keycloak.adapters.springsecurity.config.KeycloakWebSecurityConfigurerAdapter;
import org.springframework.beans.factory.annotation.Autowired;
import org.springframework.context.annotation.Bean;
import org.springframework.security.config.annotation.authentication.builders.AuthenticationManagerBuilder;
import org.springframework.security.config.annotation.web.builders.HttpSecurity;
import org.springframework.security.config.http.SessionCreationPolicy;
import org.springframework.security.core.authority.mapping.SimpleAuthorityMapper;
import org.springframework.security.web.authentication.session.NullAuthenticatedSessionStrategy;
import org.springframework.security.web.authentication.session.SessionAuthenticationStrategy;
import org.springframework.web.cors.CorsConfiguration;
import org.springframework.web.cors.CorsConfigurationSource;
import org.springframework.web.cors.UrlBasedCorsConfigurationSource;

import java.util.Arrays;

@KeycloakConfiguration
public class WebSecurityConfiguration extends KeycloakWebSecurityConfigurerAdapter {

    @Autowired
    public void configureGlobal(AuthenticationManagerBuilder auth) throws Exception {
        KeycloakAuthenticationProvider keycloakAuthenticationProvider =
                keycloakAuthenticationProvider();
        keycloakAuthenticationProvider.setGrantedAuthoritiesMapper(new SimpleAuthorityMapper());
        auth.authenticationProvider(keycloakAuthenticationProvider);
    }

    @Bean
    @Override
    protected SessionAuthenticationStrategy sessionAuthenticationStrategy() {
        return new NullAuthenticatedSessionStrategy();
    }

    @Override
    protected void configure(HttpSecurity http) throws Exception {
        super.configure(http);
        http.csrf()
            .disable()
            .authorizeRequests()
            .anyRequest()
            .authenticated()
            .and()
            .sessionManagement()
            .sessionCreationPolicy(SessionCreationPolicy.STATELESS);
    }
}
It extends the WebSecurityConfigurerAdapter and sets up all Keycloak-related configurations such as filter configuration or authentication. Everything is done to make our life easy and work out of the box with minimal configuration on our hands. We just have to define the configuration specific to our application.
You can still check out how the adapter has been implemented by exploring the code if you are interested in how things work behind the scene.
The most important part is the override of the configure() method. It is where we enforce that every received request must be authenticated, by containing the authentication token in the HTTP headers.
Because we will consume the endpoint using Postman, we can safely disable CSRF.
Disabling CSRF means that the application is now vulnerable to CSRF attacks. This type of attack can only be performed from a request coming from a browser. If we wanted to handle it safely, we would need to manage a CSRF cookie we would provide during login and check if it is sent in each request we received.
We also provide a SessionAuthenticationStrategy bean of type `NullAuthenticatedSessionStrategy. It basically does nothing, but this is fine because authentication is not handled by the application for bearer-only clients.
At the time of writing this post, the Spring Boot Keycloak adapter contains a bug that raises a circular dependencies expectation at startup.
A workaround is to declare a Bean of type KeycloakConfigResolver inside a class annotated with @Configuration, but different from the WebSecurityConfiguration class we have already defined.
@Configuration
public class ApplicationConfiguration {

    @Bean
    public KeycloakConfigResolver KeycloakConfigResolver() {
        return new KeycloakSpringBootConfigResolver();
    }
}
And we are done with the Spring Boot application.
Client Setup and Testing
Let's first start our application.
mvn spring-boot:run
To test what we have built, we need a client application that consumes the HTTP endpoint.
In a production environment, the request usually comes from a front-end Single Page Application or another backend service. For the sake of this tutorial, we are going to handle the login process to get the authentication token using Postman. We are going to use the public client we have created in the previous part.
Let’s first create a Postman collection.
We set the authorization configuration at the collection level so that every request of the collection will inherit from it, and send the token.
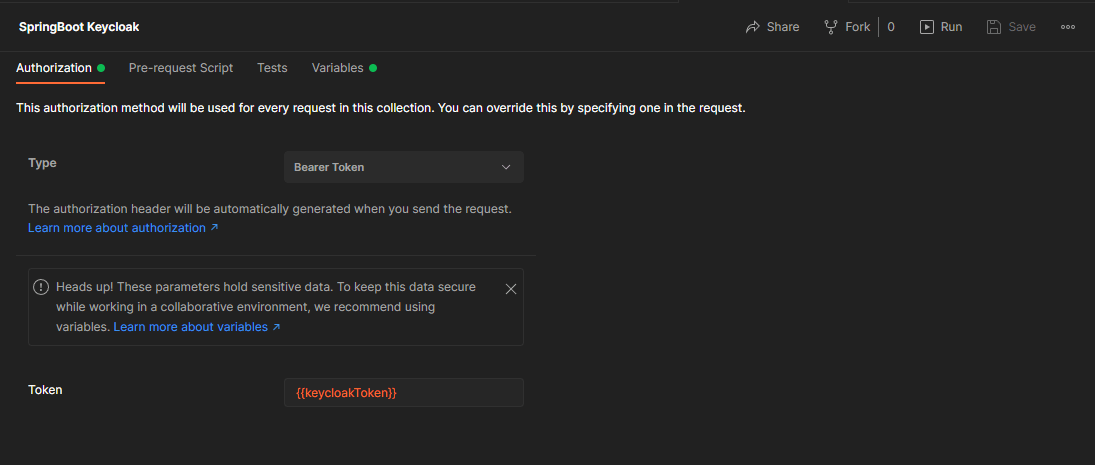
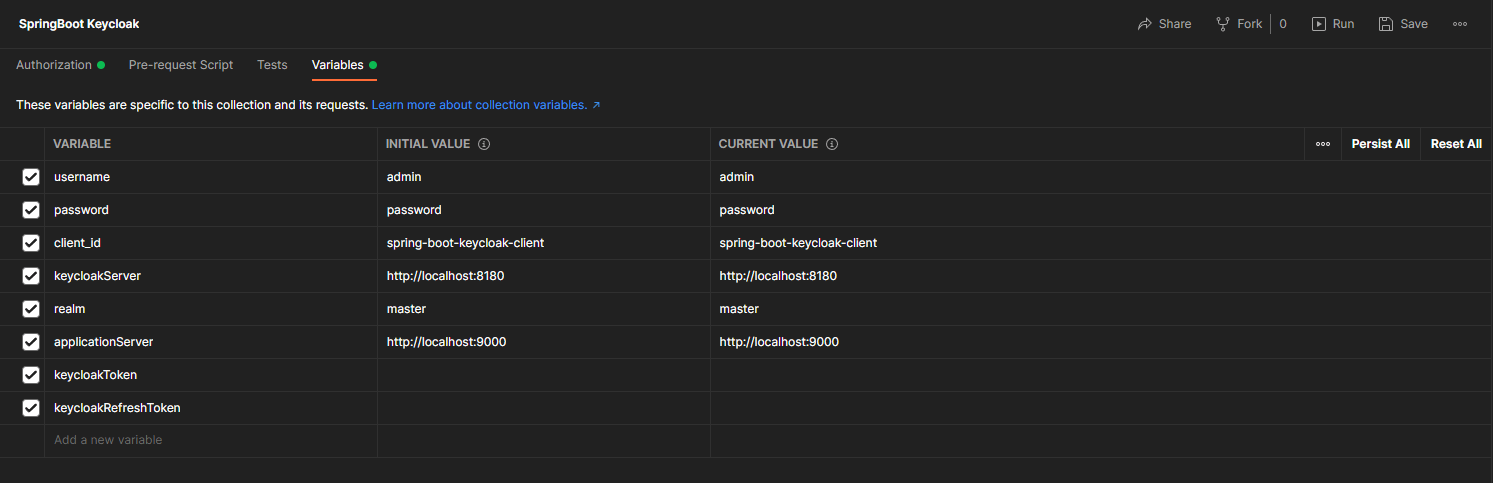
For the same purpose, we define the variables at the collection level to make them available to each request.
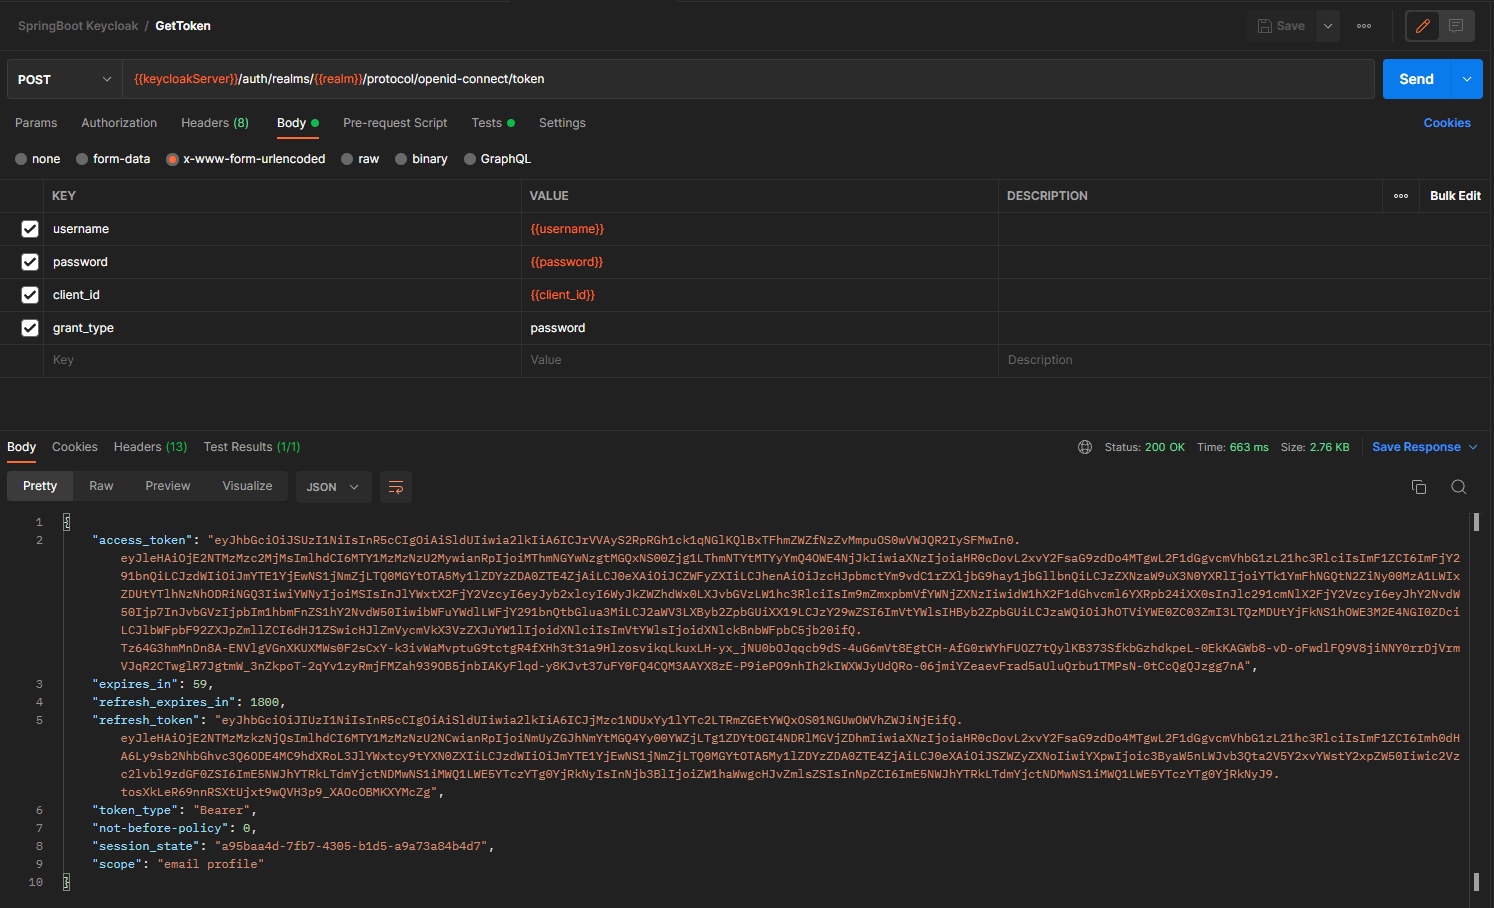
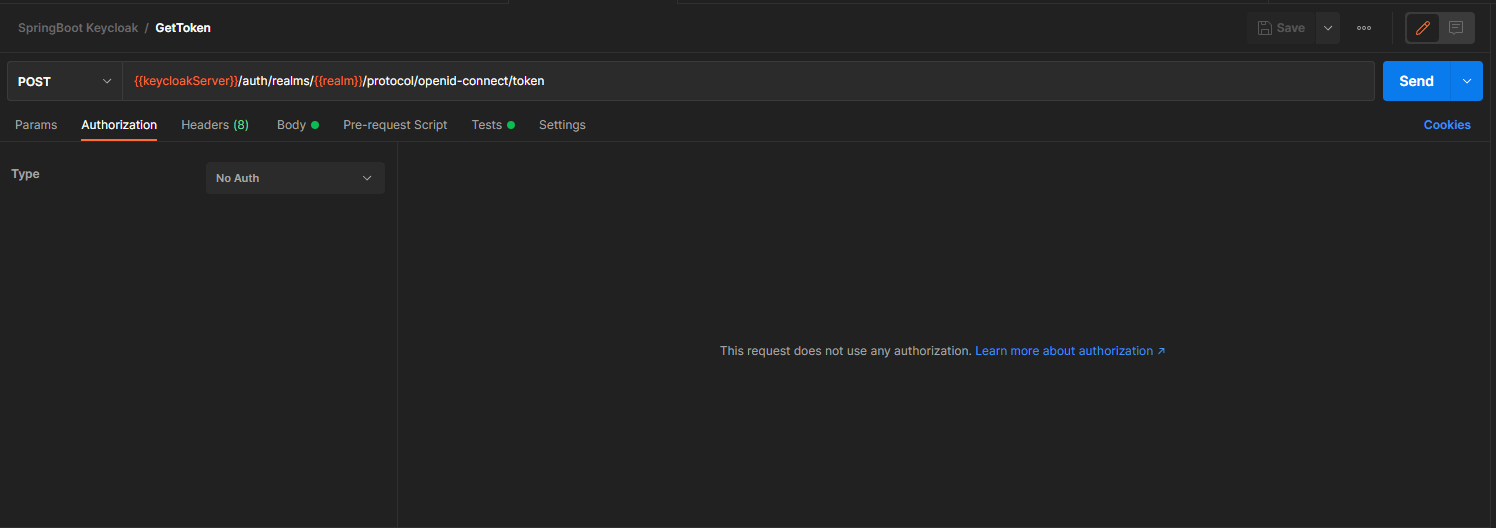
The first request is the GetToken request. It uses the OpenID token endpoint from Keycloak by following the password authentication workflow.
Because this request is sent to Keycloak, we must override the authorization configuration to indicate that no auth needs to be done.
We could manually copy and paste the token returned by Keycloak, but there is a simpler way by using the Test feature from Postman.
This feature allows us to write some code. It is usually used to run some tests on the response. But we can also leverage this feature to feed the token inside the keycloakToken variable we have defined at the collection level.

In this way, we can directly run sequentially the GetToken request followed by the GetPlant Request without doing any manual action.
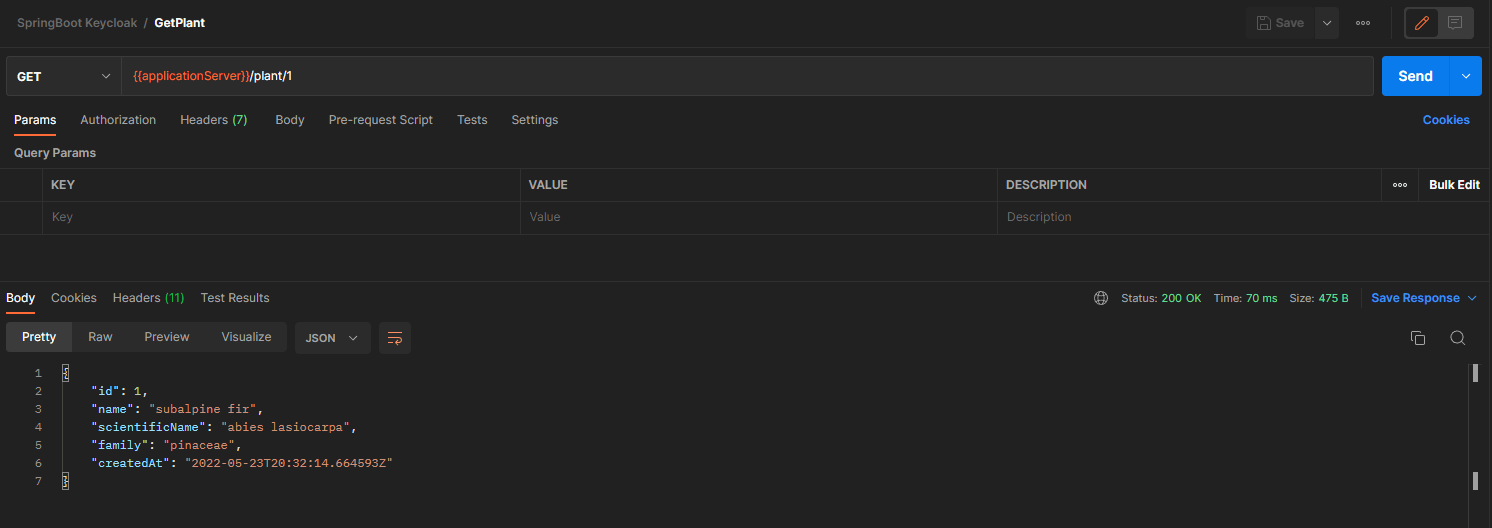
We can now successfully access the Plant endpoint.
In the following blog post, we will learn how to improve our sample application with Role-based Access.
You can access the demo project for this blog post here https://github.com/Mozenn/spring-boot-keycloak.