Set up Keycloak in Spring Boot using the Keycloak Admin API
In this blog post, we are going to set up Keycloak programmatically using the Keycloak Admin API.
The goal of this article is to set up our Keycloak realm once through the Keycloak Admin Console and then recreate this setup at will, without doing all the manual setup all over again.
For that, we are going to automate this process using Spring Boot and the java Keycloak Admin API client.
On top of that, we are going to make this process idempotent, so that we can reset the configuration at will, without worrying about the current state of our Keycloak realm. This process is especially useful in a development environment, where resetting the Keycloak configuration is frequent as we are testing our application, and we want to go back to a clean state.
Setting up the project
Let’s first set up the project.
In a previous post, we have already learned how to set up Keycloak using Docker, and we are going to use this setup as a starting point.
Of course, you can set up your Keycloak instance however you want. The only requirement is to have a running Keycloak instance.
We generate the Spring boot application using the Spring CLI as explained in a previous blog post.
To sum up, it all comes down to executing this command in our terminal.
spring init --dependencies=web,lombok spring-boot-keycloak-admin-api
In addition to the dependencies packaged in the generated project, we add the keycloak-admin-client library to our pom.xml file.
<dependencies>

		...

		<dependency>
			<groupId>org.keycloak</groupId>
			<artifactId>keycloak-admin-client</artifactId>
			<version>18.0.2</version>
		</dependency>
	</dependencies>
This library is provided by the Keycloak developers to integrate with the Keycloak Admin API easily.
With it, we can manage most of the Keycloak resources such as realm or users, and trigger all kinds of operations like exporting a realm representation and much more. Check out the Admin API official documentation for a better overview of what you can do.
From what I have seen working with the java client so far, most of the operations exposed by the Admin API can be triggered using the client, but some of them might be missing.
Initializing a Keycloak realm
What we want to do first is to write the logic to initialize a new Keycloak realm. We wrap this logic inside a KeycloakInitializer class that we annotate with the Spring @Service annotation.
@Slf4j
@Service
public class KeycloakInitializer implements InitializingBean {

    private final Keycloak keycloak;

    private final KeycloakInitializerConfigurationProperties keycloakInitializerConfigurationProperties;

    private final ObjectMapper mapper;

    private static String REALM_ID;

    private static final String INIT_KEYCLOAK_PATH = "initializer/init-keycloak.json";

    public KeycloakInitializer(Keycloak keycloak,
                               KeycloakInitializerConfigurationProperties keycloakInitializerConfigurationProperties,
                               ObjectMapper mapper) {
        this.keycloak = keycloak;
        this.keycloakInitializerConfigurationProperties = keycloakInitializerConfigurationProperties;
        this.mapper = mapper;
    }

    @Override
    public void afterPropertiesSet() throws Exception {
        REALM_ID = keycloakInitializerConfigurationProperties.getMasterRealmId();

        if (keycloakInitializerConfigurationProperties.initializeOnStartup()) {
            init(false);
        }
    }

    public void init(boolean overwrite) {

        log.info("Initializer start");

        List<RealmRepresentation> realms = keycloak.realms().findAll();
        boolean isAlreadyInitialized =
                realms.stream().anyMatch(realm -> realm.getId().equals(REALM_ID));

        if (isAlreadyInitialized && overwrite) {
            reset();
        }

        if (!isAlreadyInitialized || overwrite) {

            initKeycloak();

            log.info("Keycloak initialized successfully");
        } else {
            log.warn("Keycloak initialization cancelled: realm already exist");
        }
    }

    private void initKeycloak() {

        initKeycloakRealm();
    }

    private void initKeycloakRealm() {
        RealmRepresentation realmRepresentation = new RealmRepresentation();
        realmRepresentation.setRealm(REALM_ID);
        realmRepresentation.setId(REALM_ID);

        Resource resource = new ClassPathResource(INIT_KEYCLOAK_PATH);
        try {
            RealmRepresentation realmRepresentationToImport =
                    mapper.readValue(resource.getFile(), RealmRepresentation.class);
            keycloak.realms().create(realmRepresentationToImport);
        } catch (IOException e) {
            String errorMessage =
                    String.format("Failed to import keycloak realm representation : %s", e.getMessage());
            log.error(errorMessage);
            throw new RuntimeException(errorMessage, e);
        }
    }

    public void reset() {
        try {
            keycloak.realm(REALM_ID).remove();
        } catch (NotFoundException e) {
            log.error("Failed to reset Keycloak", e);
        }
    }
}
We add the option to trigger the initialization process at the start of the application by implementing the InitializingBean interface.
As you can see at the top of the class definition, we declare a KeycloakInitializerConfigurationProperties class to store the properties we don’t want to hard code and that we might want to dynamically change at runtime.
package com.mozen.springbootkeycloakadminapi.initializer;

import lombok.AccessLevel;
import lombok.Data;
import lombok.Getter;
import org.springframework.boot.context.properties.ConfigurationProperties;

@Data
@ConfigurationProperties(prefix = "keycloak-initializer")
public class KeycloakInitializerConfigurationProperties {

    @Getter(AccessLevel.NONE)
    private boolean initializeOnStartup;

    public boolean initializeOnStartup() {
        return initializeOnStartup;
    }

    private String masterRealm;

    private String applicationRealm;

    private String clientId;

    private String username;

    private String password;

    private String url;
}
Those configurations are mapped to the properties added inside the application.yaml file.
---
keycloak-initializer:
  initializeOnStartup: false
  masterRealm: master
  applicationRealm: SpringBootKeycloakAdminAPI
  client-id: admin-cli
  username: admin
  password: password
  url: http://${KEYCLOAK_HOST:localhost}:${KEYCLOAK_PORT:8180}/auth/
Most of them are needed to initialize the Keycloak Admin client.
@Configuration
public class ApplicationConfiguration {

    @Autowired
    KeycloakInitializerConfigurationProperties keycloakInitializerConfigurationProperties;

    @Bean
    protected Keycloak keycloak() {
        return KeycloakBuilder.builder()
                .grantType(OAuth2Constants.PASSWORD)
                .realm(keycloakInitializerConfigurationProperties.getMasterRealm())
                .clientId(keycloakInitializerConfigurationProperties.getClientId())
                .username(keycloakInitializerConfigurationProperties.getUsername())
                .password(keycloakInitializerConfigurationProperties.getPassword())
                .serverUrl(keycloakInitializerConfigurationProperties.getUrl())
                .build();
    }
}
We use the default master realm with the credentials defined during the Keycloak setup.
The URL of the Keycloak server depends on how you have set up your Keycloak. If you have followed the setup walkthrough mentioned during the introduction, Keycloak is available at localhost on port 8180.
We also use the admin-cli client provided by default in the master realm. As the name suggests, this client is specifically configured to be used by any admin API client with a public access type. ( no secrets needed).
Finally, we also need to specify the id of the realm we set up to be able to remove it if the overwrite option is true during the initialization.
Setting up the Keycloak realm manually
What we have done so far will allow us to initialize or reset the Keycloak realm set up at will, but we first need to set it up manually once, so that we can get the partial representation.
For that, we go to the Keycloak admin console exposed at the following URL : http://localhost:8180
The credentials to log in to the console are set during the Keycloak bootstrap. If you have followed the Keycloak setup with Docker, those credentials are set using environment variables stored in a .env file, and are as follow.
KEYCLOAK_USER=admin
KEYCLOAK_PASSWORD=password
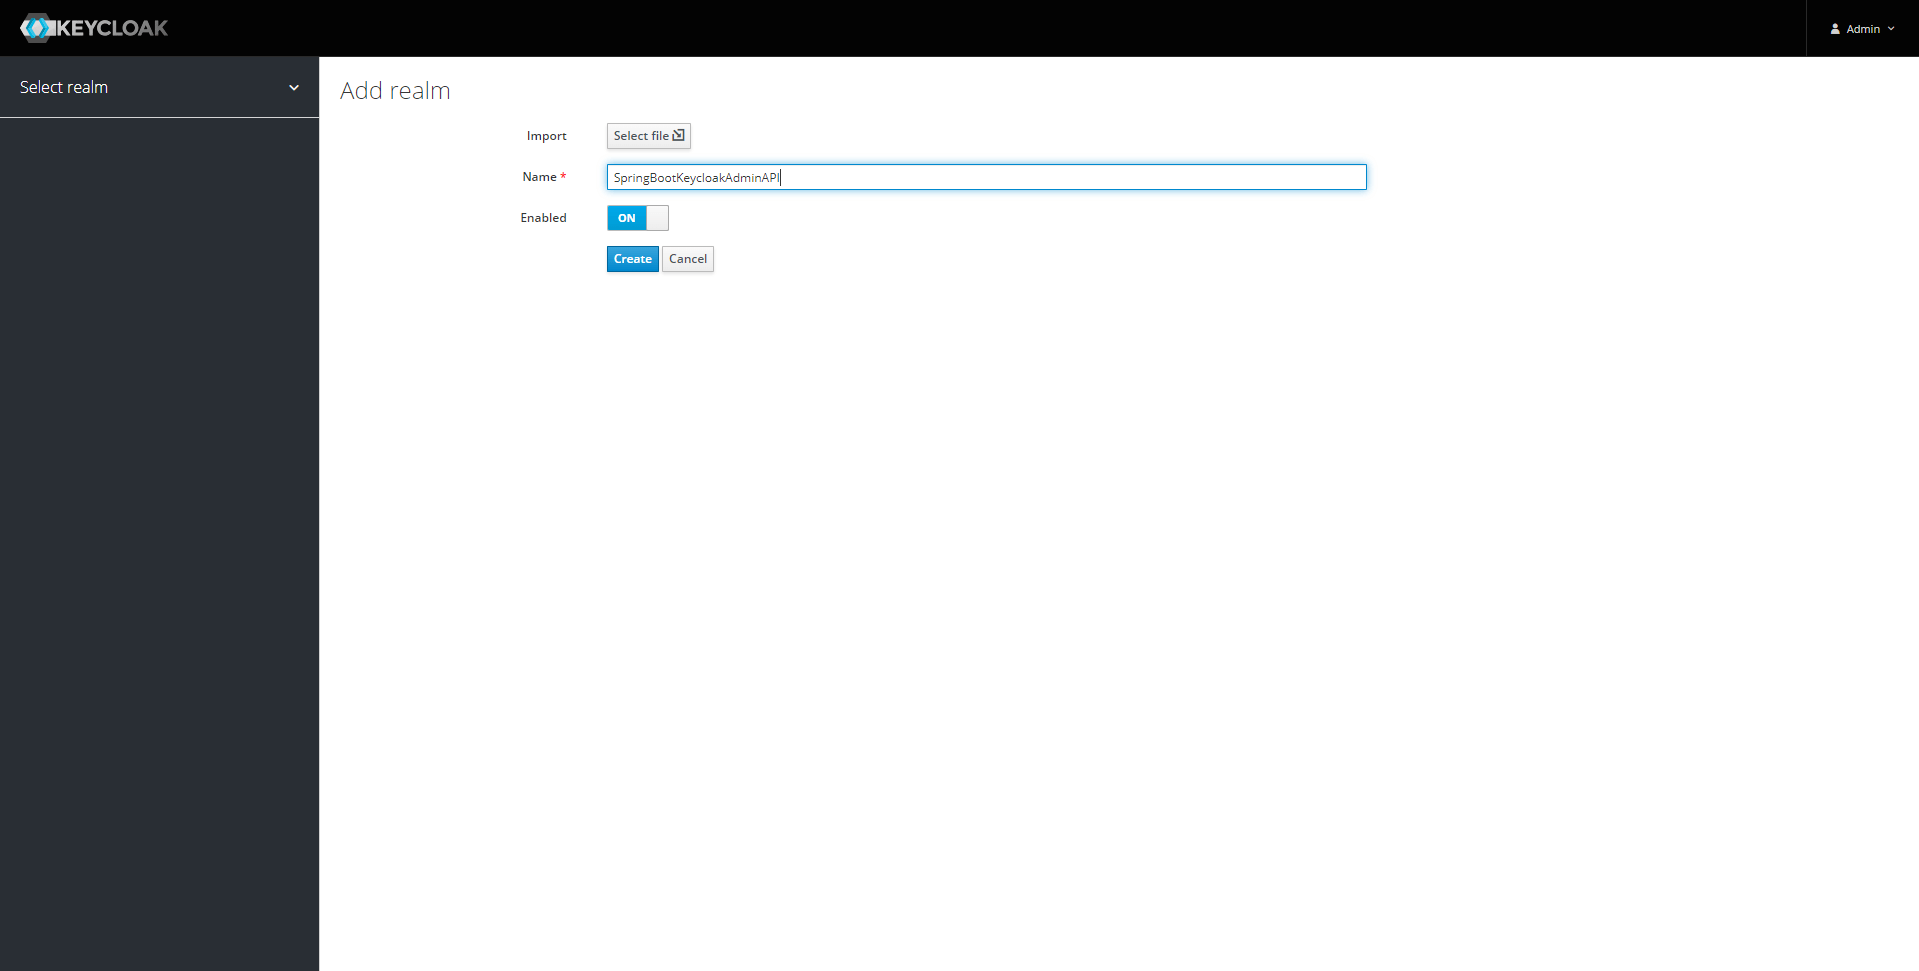
Once inside the admin console, we first create a new realm.
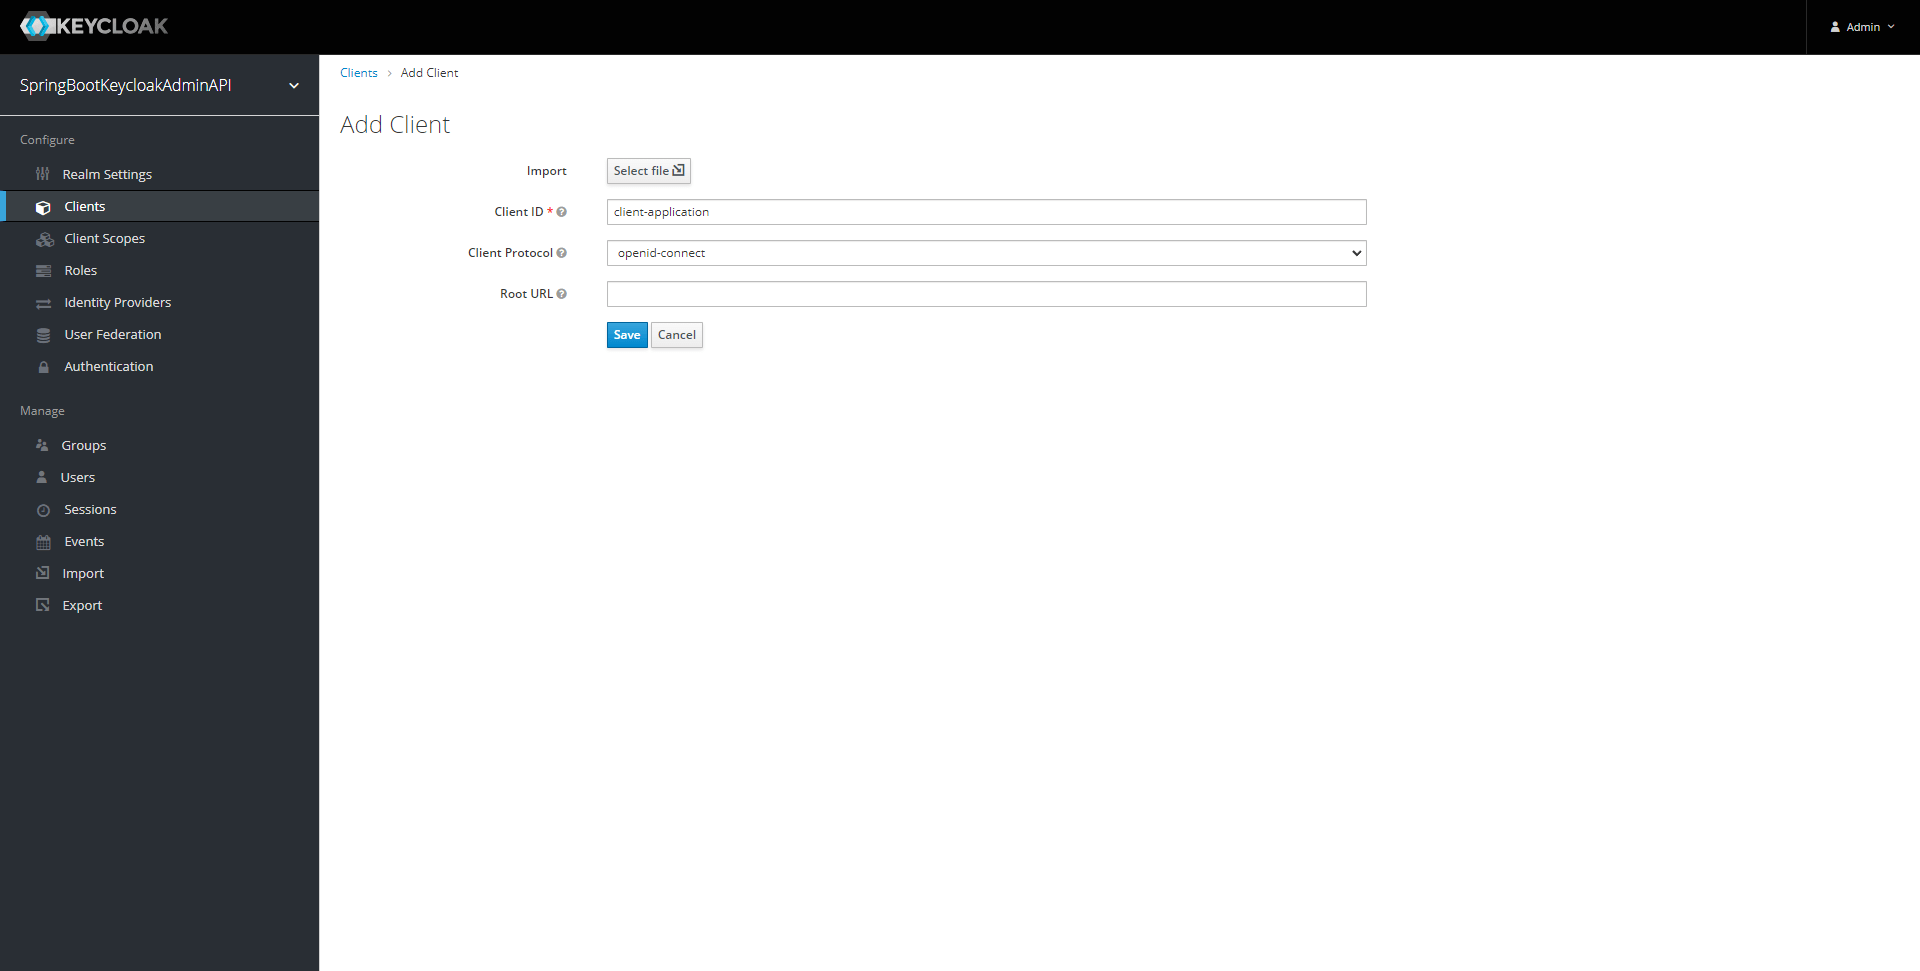
Let’s also create a new client.
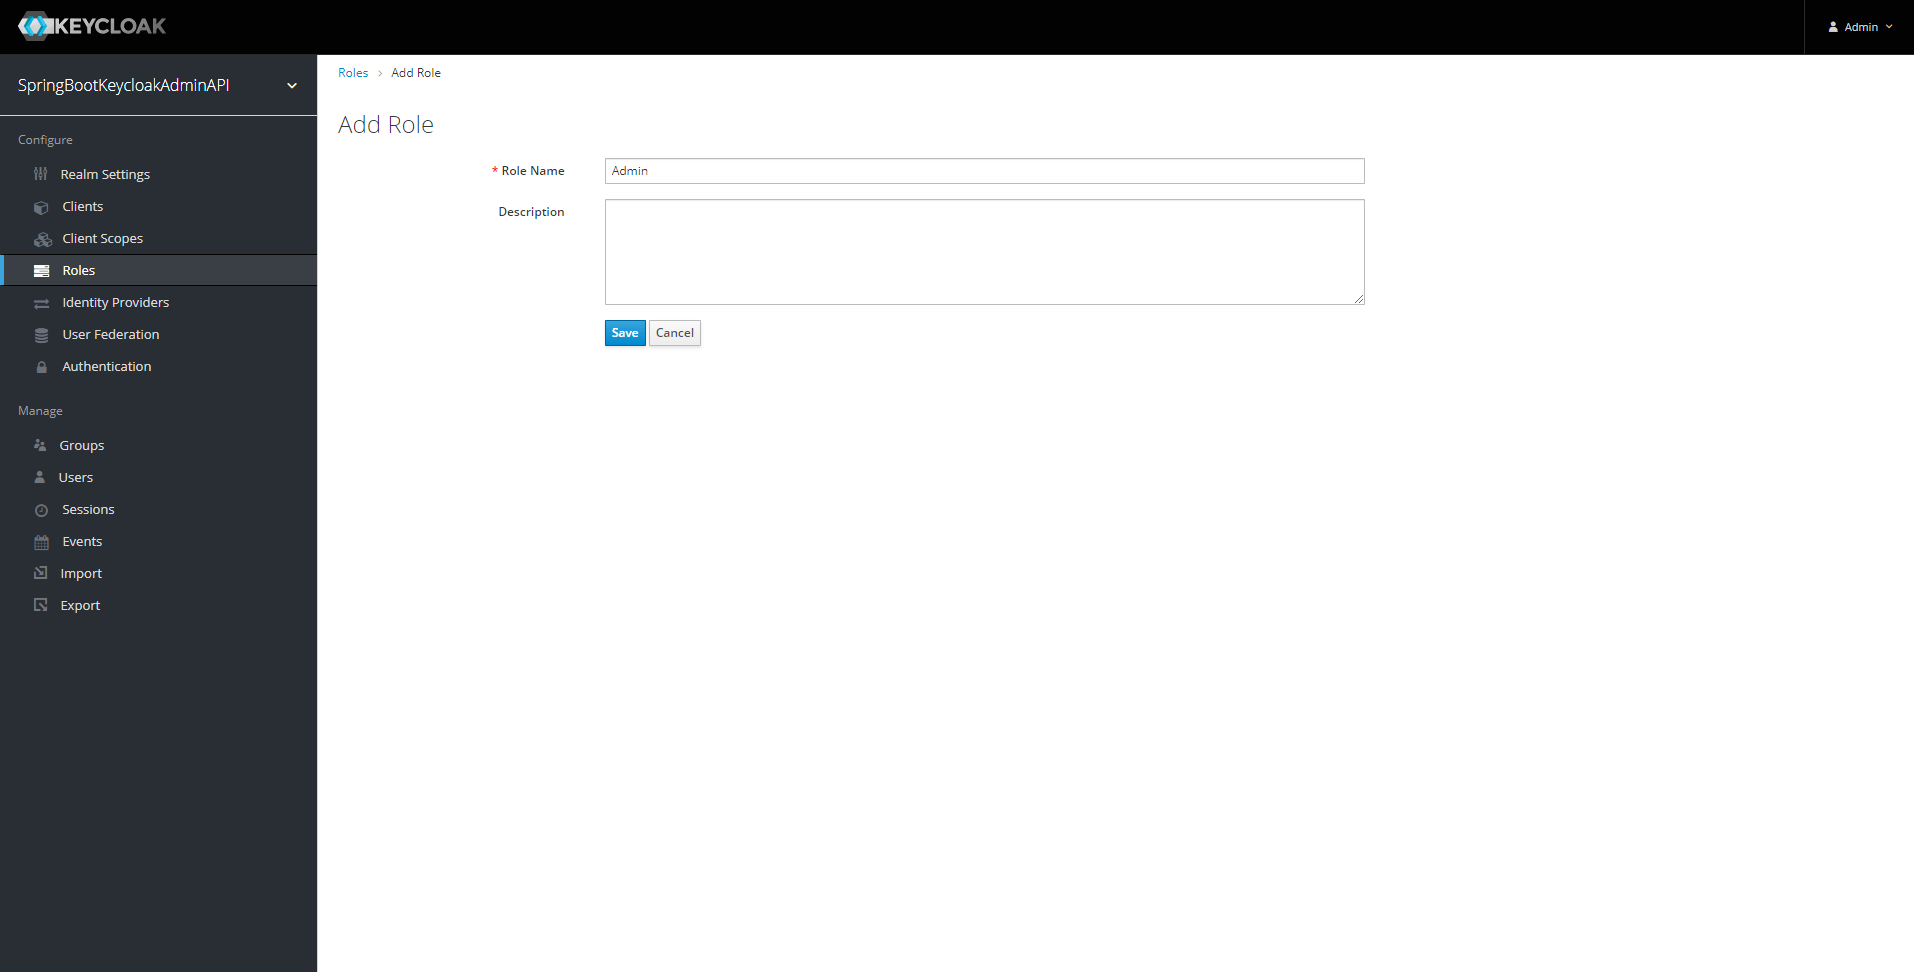
A new role for Admin users.
As well as two users

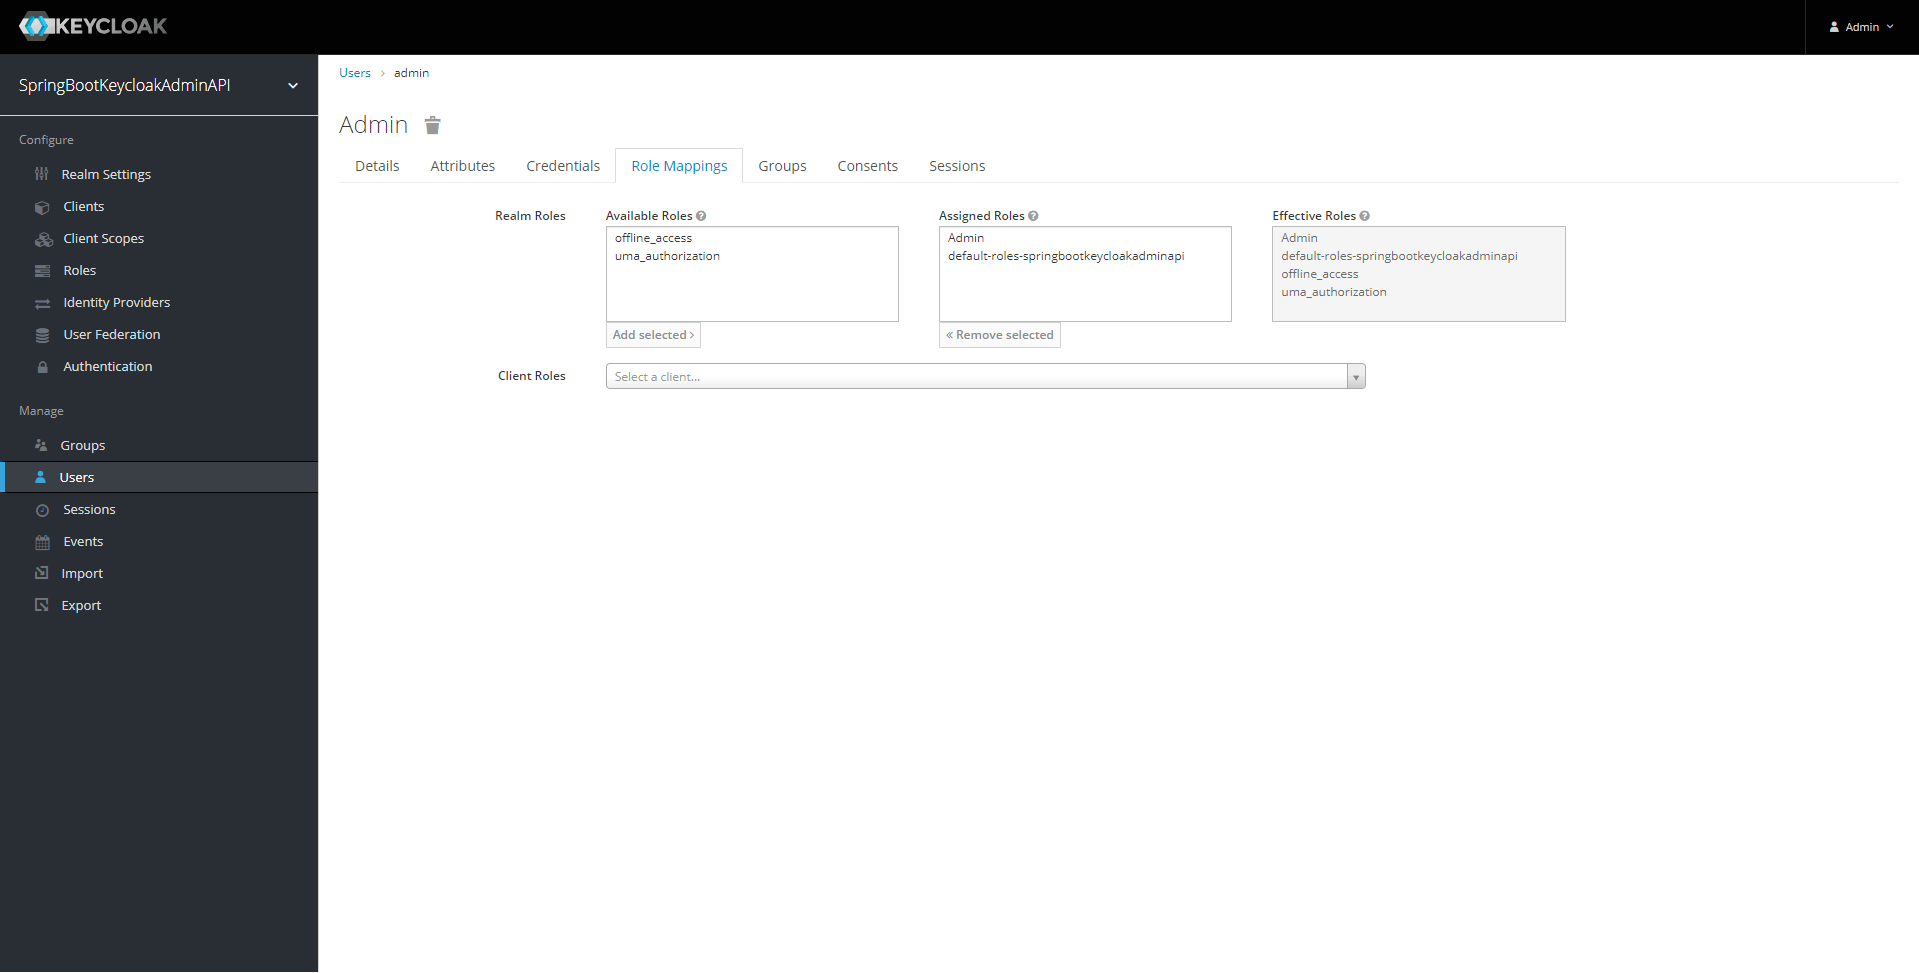
Finally, we give the admin role to the admin user through the ‘Role Mapping’ menu.
We could create a lot more, but let’s stick to that for this article.
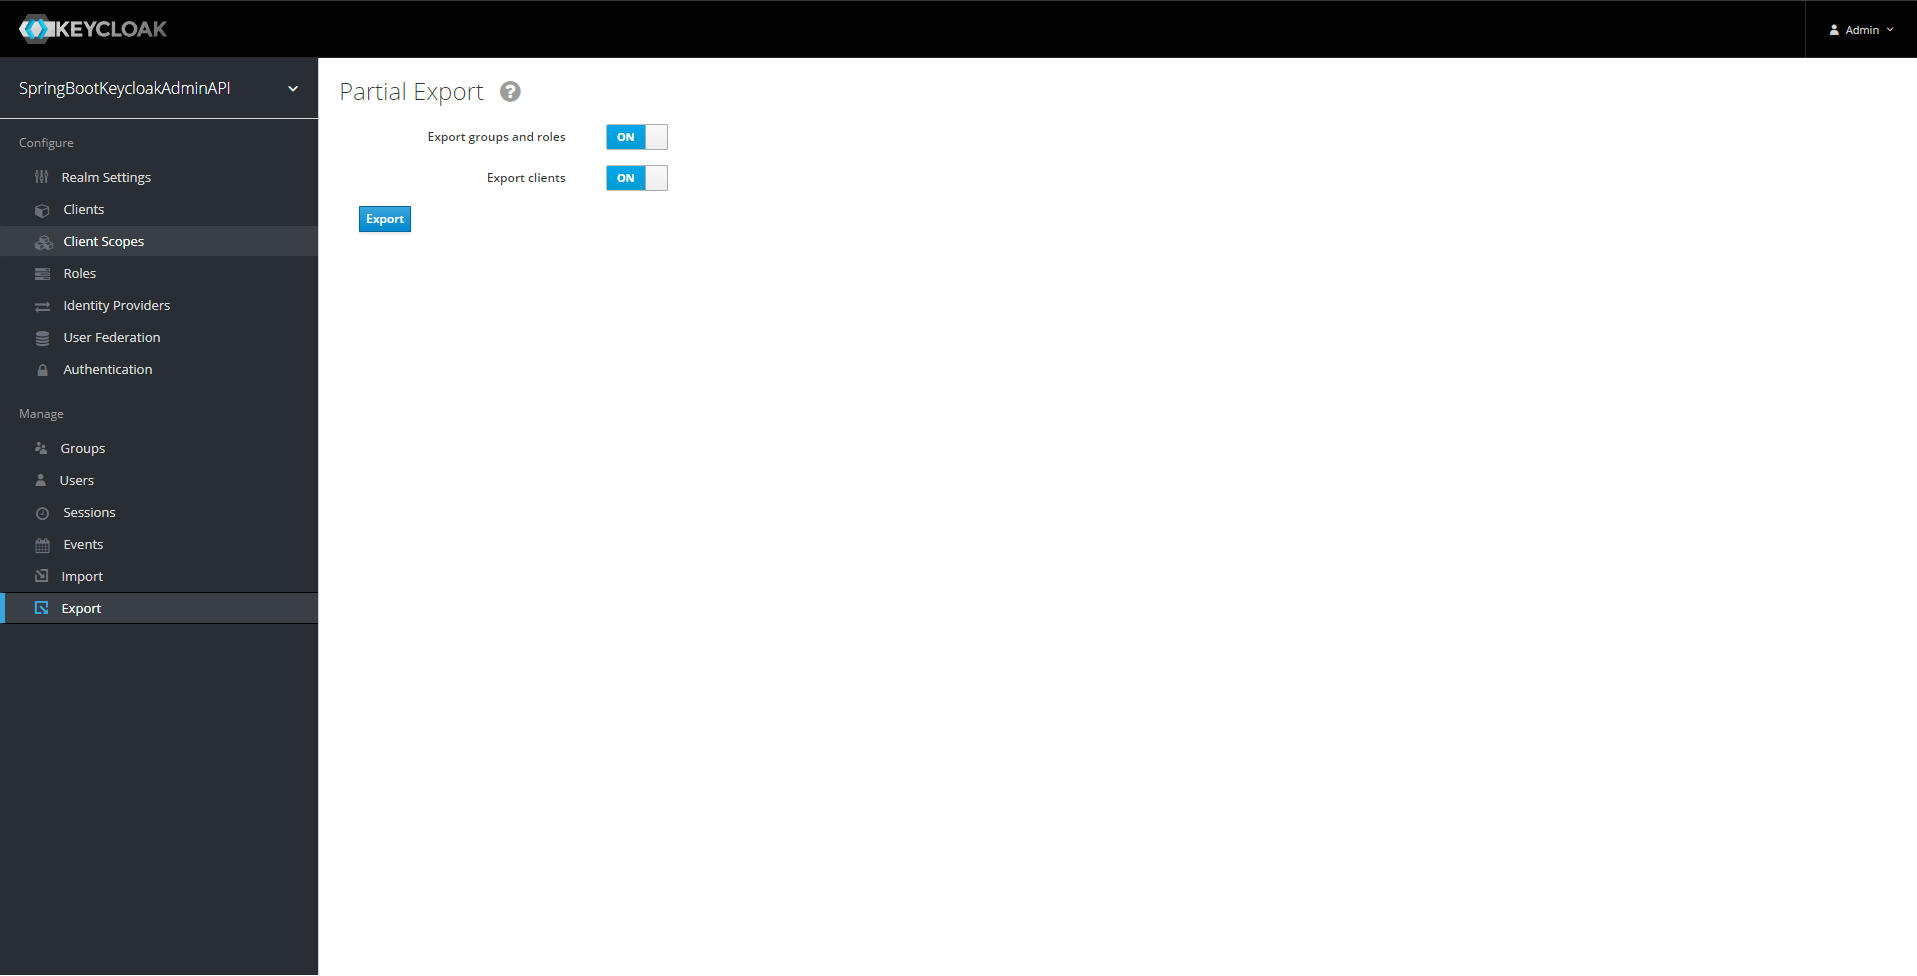
We now want to export our configuration to be able to re-apply it at will.
We can use the partial export feature available in the Export windows for that. It will generate a representation of our realm using a JSON representation.
We now place this JSON file at the expected path in the resources of our Spring Boot application.
We could try running our application to test that everything is working fine, but there is something missing …
Initializing Keycloak users
The partial export feature is a great way to quickly get the representation of our realm.
However, as the name suggests, this export is partial, and not all configurations are exported.
For example, the users we have set up manually are not part of the generated representation, which can be an issue depending on your use case.
But do not worry, we are going to overcome this issue by doing our own thing.
First, let’s define the data model representing a Keycloak user.
package com.mozen.springbootkeycloakadminapi.initializer;

import lombok.AllArgsConstructor;
import lombok.Data;

@Data
@AllArgsConstructor
public class KeycloakUser {

    private String username;

    private String password;

    private String email;

    private boolean isAdmin;
}
I am keeping the model simple here, but you can add any extra field you want to set in the Keycloak user representation later on.
We then extend the initialization process by adding a step to initialize Keycloak users.
@Slf4j
@Service
public class KeycloakInitializer implements InitializingBean {

	...

	private void initKeycloak() {

	        initKeycloakRealm();
	        initKeycloakUsers();
    }

	...

	private void initKeycloakUsers() {

	        List<KeycloakUser> users = null;
	        try {
	            Resource resource = new ClassPathResource(INIT_KEYCLOAK_USERS_PATH);
	            users =
	                    mapper.readValue(
	                            resource.getFile(),
	                            mapper.getTypeFactory().constructCollectionType(ArrayList.class, KeycloakUser.class));
	        } catch (IOException e) {
	            String errorMessage = String.format("Failed to read keycloak users : %s", e.getMessage());
	            log.error(errorMessage);
	            throw new RuntimeException(errorMessage, e);
	        }

	        users.stream().forEach(u -> initKeycloakUser(u));
	    }

	    private void initKeycloakUser(KeycloakUser user) {

	        UserRepresentation userRepresentation = new UserRepresentation();
	        userRepresentation.setEmail(user.getEmail());
	        userRepresentation.setUsername(user.getUsername());
	        userRepresentation.setEnabled(true);
	        userRepresentation.setEmailVerified(true);
	        CredentialRepresentation userCredentialRepresentation = new CredentialRepresentation();
	        userCredentialRepresentation.setType(CredentialRepresentation.PASSWORD);
	        userCredentialRepresentation.setTemporary(false);
	        userCredentialRepresentation.setValue(user.getPassword());
	        userRepresentation.setCredentials(Arrays.asList(userCredentialRepresentation));
	        keycloak.realm(REALM_ID).users().create(userRepresentation);

	        if (user.isAdmin()) {
	            userRepresentation =
	                    keycloak.realm(REALM_ID).users().search(user.getUsername()).get(0);
	            UserResource userResource =
	                    keycloak.realm(REALM_ID).users().get(userRepresentation.getId());
	            List<RoleRepresentation> rolesToAdd =
	                    Arrays.asList(keycloak.realm(REALM_ID).roles().get("admin").toRepresentation());
	            userResource.roles().realmLevel().add(rolesToAdd);
	        }
	    }

}
We store the user representation in a JSON file in the same location as the Keycloak partial representation, and we use the Jackson library to deserialize it.
Once we have our list of user representations, we can create them one by one using the Keycloak admin API client.
As I have previously said, you can customize your users as you see fit by adding more fields in the JSON user model and feeding them into the user representation before creating them via the admin API.
And our initialization process is now completed!
Testing the initialization process
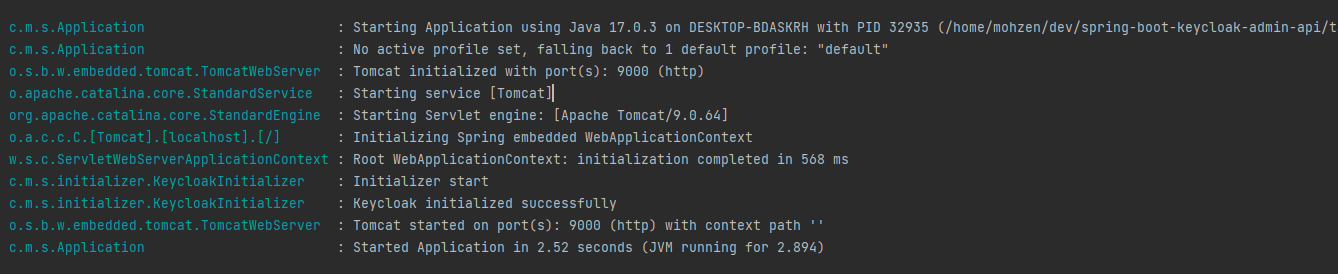
We can start our application
mvn spring-boot:run
By checking the log, we can see that our initialization process has run.
And If we go back to the Keycloak Admin console, we can see that our configuration has been re-applied successfully!
Initializing Keycloak using HTTP endpoints
But what if we want to initialize or reset our Keycloak configuration at runtime, without restarting our application?
For that, we can build an HTTP endpoint that we can query each time we want to trigger the initialization process.
It is as simple as creating a new Spring Controller and exposing the endpoint to execute the initializing or reset process.
@RestController
@RequestMapping("/keycloak")
public class KeycloakInitializerController {

    private KeycloakInitializer keycloakInitializer;

    public KeycloakInitializerController(KeycloakInitializer keycloakInitializer) {
        this.keycloakInitializer = keycloakInitializer;
    }

    @PostMapping("/init")
    public void init(@RequestParam boolean overwrite) {
        keycloakInitializer.init(overwrite);
    }

    @DeleteMapping("/reset")
    public void reset() {
        keycloakInitializer.reset();
    }
}
We can test those endpoints with the following cUrl commands.
curl -X POST 'http://localhost:9000/keycloak/init?overwrite=true'

curl -X POST 'http://localhost:9000/keycloak/reset'
And that is it. We can now trigger our Keycloak initialization at will.
A word of caution. This process is great for the development and testing environment. Still, it might be a good idea to disable it in production so that you do not trigger it and overwrite your production configuration by accident.
You can check out the demo repository on Github.